|
NEW Update (2018): Since I'm
brewing less beer these days, I went back to my original method of
saving the yeast cake in multiple plastic containers in the fridge.
When I was brewing a lot more beer, I was going through a lot more
yeast, so the second method worked a little better at the time.
I just needed to plan ahead and make a starter a couple days before
brew day. Now that I don't plan out my brew days as much and
just brew as I have time, being able to grab a portion of a saved
yeast cake out of the fridge is more convenient. Both methods
work very well, so either will work for you depending on how often
you brew and what fits best into your process.
Update: When I was brewing a lot
more often & ten gallons at a time, I started "saving" yeast a little differently than previously
mentioned on this site. Both methods work great and save a ton
of money on yeast, but I find my new method to be a good way to
preserve the quality of the yeast in case you won't be re-pitching
it for awhile. Both methods are solid, so choose whatever best
fits your brewing schedule/system.

|
|
|
A friend of mine in the beer club mentioned using 2-liter plastic
bottle blanks/preforms for saving yeast, and he knew someone at a plastic
manufacturing plant that gave him a case of their "defects" which
just means they didn't quite meet weight & size specifications.
I decided to try it out. The nice thing about this method is
that I feel much more comfortable saving yeast this way for extended
periods of time. Since there isn't as much trub/break material
and no hops to worry about, you have a pretty clean specimen of
yeast. This method requires a little more thinking ahead since
you should (need) to make a starter a day or two before your brew. I
say "need" because 1 vial of saved yeast isn't really enough to
pitch directly into a batch of anything higher than 1.030 starting
gravity. You could always pitch a couple vials if you don't
have time to make a starter though. If you don't want to make
a starter, consult the yeast calculator on MrMalty.com. I
typically make a 800-1000ml starter using 1/2 cup DME for an average
(1.040-1.060) batch of beer.
-
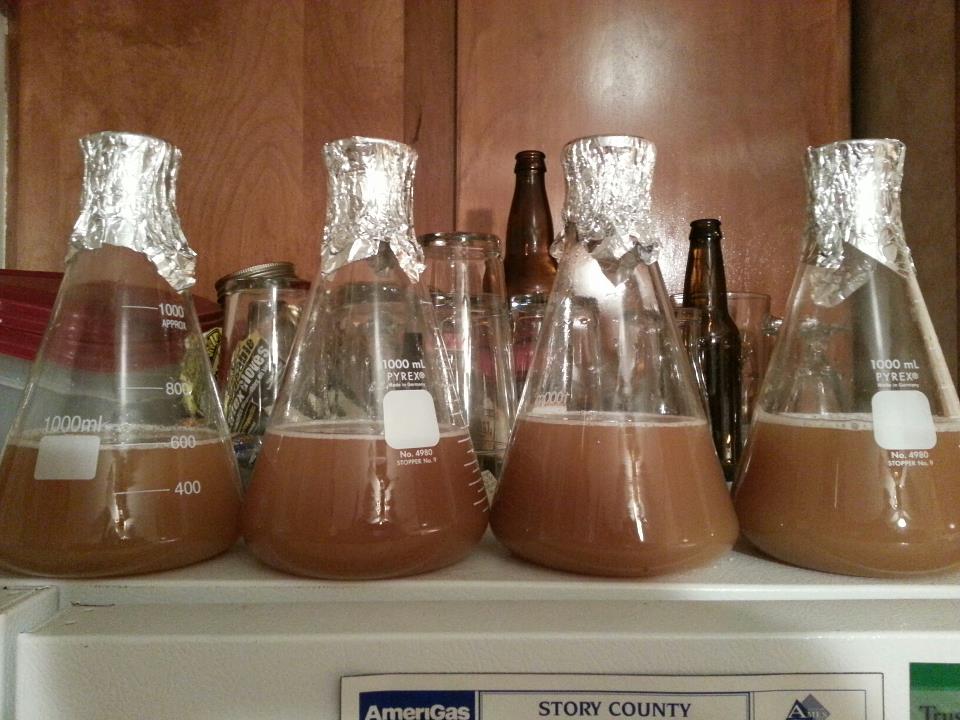
Make a large (1500-2000ml with 1 cup DME) yeast starter,
chill, and pitch your vial/smack-pack of yeast
-
Allow the starter to ferment out completely.
This usually takes 2-3 days, and you'll know it's done when the
yeast drops out and your wort/beer clears up.
-
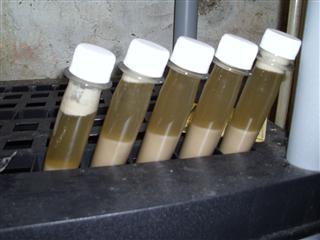
Sanitize a small funnel and 5-6 yeast caps &
vials***
-
Position the sanitized vials in a container that
allows them to sit upright for filling
-
Pour out mostly all of your starter wort/beer,
leaving only enough to swirl the yeast into suspension.
This usually takes a little getting used to, but you can eyeball
it the first time.
-
Sanitize the lip of your starter flask, swirl
the slurry in the bottom to get everything into suspension, then
funnel the slurry into your vials.
-
Screw on your caps and label the vial with the
strain of yeast it contains

Where to find the Vials?
I did a search for these vials online and they can be a
little difficult to find. The plastic caps can be purchased at
several online homebrew stores like Northern Brewer, MoreBeer, and
Midwest Supplies. You can also save and reuse White Labs vials
if you have some sitting around. Here's a link Shawn P. sent
me via email after reading through this tutorial of where to get
vials:
Shawn also tested out some 50ml centrifuge tubes that he said are
easy to find and worked great. Here's the link to those for
anyone interested in giving them a try:
-
http://www.novatech-usa.com/Products/Plastic-Centrifuge-Tubes
|
|
|
|

The question of how to save and reuse yeast gets
brought up on a lot of online homebrew forums, so I thought that I'd
write up a little how-to to show people what's worked for me.
Quick Tips:
-
*SAFETY TIP* I only use plastic containers to save
yeast because they can withstand the pressure that sometimes
builds up with saving yeast. That way, I can have a
completely sealed container and not worry about any funk getting
in. If you choose to go with glass, make sure you don't
completely seal the vessel. Use a stopper with an airlock
or some other method that will allow pressure to escape.
-
Make a 6 gallon batch of beer when you know you're going to save
the yeast cake. When you transfer your beer into the
fermenter, leave the last gallon of break material and hops
behind so it doesn't end up in the saved yeast slurry.
-
Always pitch up in gravity
-
Only save yeast for 2 to 3 generations to avoid mutations
-
Even when using plastic containers for your yeast, you should
vent the pressure on these every 2-3 weeks in the fridge just to
release extra pressure. I've made the mistake of not venting
pressure on these over time, only to end up with a yeast volcano
that I can't use on brew day.
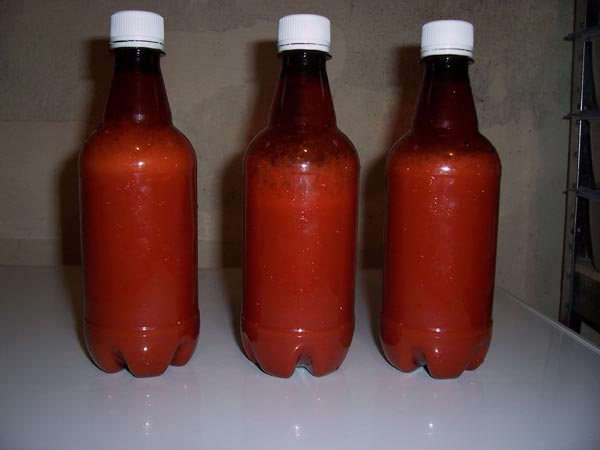
What's Needed to Save Yeast? All you
need to save yeast is a few 16 oz plastic beer bottles (as seen
above), a funnel, some type of label, and an empty 6-pack holder.
The reason I use plastic bottles instead of glass is simple.
Even though the yeast will be stored in the refrigerator, they are
still working and putting off CO2 at the lower temperature.
The plastic bottles can handle quite a bit of pressure without
bursting. When I pull the yeast out of the fridge on brew day,
often times the bottle is under quite a lot of pressure and is very
hard to press in on.
How Long Can the Yeast be Saved Before Use?
I typically try to reuse my yeast within a month or two, but I've
heard of people using it several months later without any problems.
If you have saved yeast for longer than 2 or 3 months, it would
probably be best to make a starter to check if the yeast is still
viable (which it almost definitely should be). I've had good
luck pitching straight from the bottle at least 2 months after
saving the yeast.
When Should the Yeast be Saved? I
like to keep mostly all of my beers in the primary fermenter for at
least 2 weeks. This gives the yeast plenty of time to eat
through the sugars and clean up any of their byproducts. It
also allows the yeast to drop out of suspension so you can be sure
you're getting most of the yeast at the bottom of the fermenter.
What Type of Beers Can Yeast be Saved From?
I typically save yeast from lower gravity beers like English
Bitters, Scottish 60 /-, American Wheat, Cream Ales, Blond Ales,
etc. By saving yeast from lower gravity beers, you are putting
less stress on the yeast and ensuring that what you end up with will
be fresh and won't produce any off-flavors. NOTE: Always try
to pitch up when saving yeast. For example, don't pitch a
yeast slurry from a 1.060 beer onto one that's 1.040. You may
experience some off-flavors when doing this. Also, I usually
don't save any yeast from beers over 1.060 as a general rule.
By that point, the yeast may start producing undesirable flavor
characteristics. I also only usually save 2 or 3 generations
of yeast before starting over. When saving yeast at home you
can only be so clean and will likely cause some yeast mutation down
the road. I remember having a slurry of WLP002 that was a few
generations old and the beer I made with it tasted more like a
Belgian. It wasn't infected, but the flavor profile of the
yeast had definitely mutated.
Now that I've given you a little background on
what you need to get started, here's my procedure for saving yeast:
Sanitize three 16 oz plastic beer bottles along with the other
equipment you use to transfer your beer.
Siphon your beer off the yeast cake, but be sure to leave about 1/2
inch of beer behind to help get the yeast back into suspension.
Once the beer has been siphoned off the yeast cake, arrange the
sanitized beer bottles in the empty 6-pack holder. You can see
how I distribute them above. With the lid on your fermenter,
swirl the bucket to get the yeast back into suspension with the
little bit of beer you have left. If you still have chunks of
yeast sticking to the bottom, use a sanitized spoon to stir them
into your slurry. If you're using a bucket for a fermenter, be
careful not the scratch it with the spoon. A plastic spoon
would be your best bet here.
When you have gotten your beer and yeast mixed up into a slurry,
place your sanitized funnel into the plastic beer bottles and begin
filling them up. I find that I can fill three 16 oz beer
bottles from a standard yeast cake. You may want to sanitize
an extra bottle if it's your first time saving yeast. I
typically will fill each bottle about 3/4 of the way and then go
back if I have any yeast slurry left over. Once the bottles
are filled, screw down the sanitized cap fairly tight to ensure a
proper seal. Dry off the top of the cap and apply a label that
gives the strain of yeast and the date it was saved. I like to
use the little round garage sale stickers that come in a variety of
colors. This helps me keep track of the different strains
easily.
The above pictures show what the yeast slurry looks like after it's
settled and been in the fridge for awhile. You can distinctly
see the yeast on the bottom of the bottles. The pictures on
the right show the different strains of yeast that are stored in my
kegerator.
|
|
|
|
|
|
UPDATE (2/7/2014) - I've had a few people
email me about how long the saved yeast lasts in the fridge. I
typically like to use the yeast within a few months in an ideal
world. That being said, the longest amount of time I've held
the yeast for has been about 6 months. After that, I'd
probably just get a new yeast packet from the homebrew shop and
start over. Also, the bottles can build up a good amount of
pressure and it can be hard to get them open without the yeast
spraying all over the place.
On brew day, take your yeast slurry out of the
refrigerator and slowly unscrew the lid. Depending on the
yeast you saved, it may just sit there or it could try to explode
out of the bottle. I've had both happen to me. If you
want, you can pour off some of the beer that's sitting on top of the
yeast, but I usually pour the whole thing into the new wort.
Let the yeast warm up to around room temperature
so you don't shock it when pitching it into your fresh wort.
I've actually forgotten to take the yeast slurry out of the fridge
until right before I pitched, and I didn't notice any off-flavors by
pitching cold. It's just better for the overall yeast health
if the slurry is close to the temperature of the wort.
For beers with a medium starting gravity (1.050
to 1.065 or so) I will pitch one of my saved slurries, or 1/3 of a
yeast cake. There's a really nice yeast calculator on
Mr. Malty (Jamil Zainasheff's
Website) that calculates how much yeast you should pitch
depending on your starting gravity. Personally, I don't use
this website but several people do with great success. If a
beer is over 1.075, I typically pitch 2 slurries and call it a day.
Before I pitch the yeast, I'll give the bottle a
good shake. This gets everything suspended and makes it easier
to get all the yeast into your new batch of wort. After that,
just follow your normal fermentation procedure.
If you have any questions about saving yeast or
anything else, please feel free to contact me at the email address
listed on the bottom of this page. Thanks for looking and
happy brewing!
|
|